

Baking Directions
-
Disney® Frozen® Snow Globe Cookie Kit
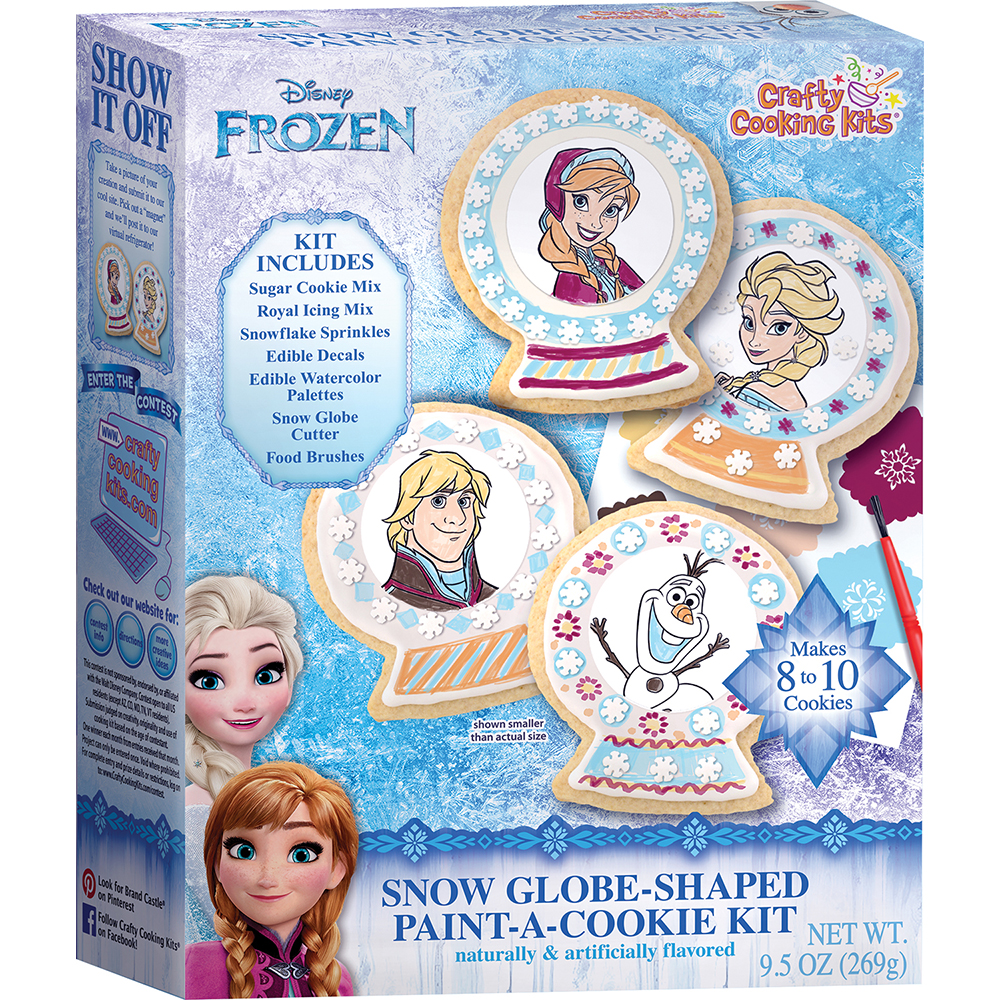
Disney® Frozen® Snow Globe Cookie Kit
Email These DirectionsYou will need:
For sugar cookies:
4 TBSP room temperature butter
1 eggFor royal icing
5 tsp. water
1 cup powdered sugarDirections
(Adult supervision required)Prepare
Adults Preheat oven to 350°F. Lightly grease baking sheet. Wash cutter with warm, soapy water and dry thoroughly.
Kids Be sure to wash hands. Cooking can be messy work. You might want to wear a smock or apron.Mix
Adults Combine cookie mix, butter and egg*. Mix by hand or with an electric mixer until well-blended.
Kids On a lightly floured surface, roll cookie dough to 3/16-inch thick. Make shapes with cutter, gathering and rerolling dough as needed. HINT: If dough becomes sticky, place in fridge for 10 minutes, also flour rolling pin and dough liberally. Place 2 inches apart on prepared baking sheet.Bake
Adults Bake for 12 to 15 minutes or until edges are golden brown.Cool
Adults Remove cookies from oven and let cool on baking sheet for 1 minute. Transfer to rack to cool completely.Ice
Adults In a small mixing bowl, combine icing mix and water, stir until dissolved. Add powdered sugar and whisk with a fork until smooth.
Kids Spread icing on each cookie. Empty snowflake shapes into a small dish.
Adults Cut open pouch and gently peel edible decals from backing sheet. HINT: If decals stick to backing, place sheets in freezer for 2 minutes before continuing. Assist kids in applying decals. If they tear, simply realign on cookie.
Kids Place edible decals onto wet icing. Be careful--decals should not be moved once applied. Immediately place snowflakes onto icing around decal. HINT: Snowflakes can be added on top of decal by securing with a dab of icing. Icing will dry completely in 45 minutes at room temperature or place cookies in refrigerator to speed up the process.Paint
Adults Place a bowl of water and paper towel next to each work area. Remove watercolor palettes and paintbrushes from pouches.
Kids Wet brush and tap to remove excess water. Place tip of brush into part of one color on edible watercolor palette and rub gently to activate color. Paint cookies as desired, rinsing brush between colors. Place finished cookies on a platter and enjoy!*High Altitude (over 3500 ft.): Add 3 TBSP. flour and 2 TBSP. water to mix. Mix as directed. Place dough in refrigerator for 10 minutes before beginning rolling process.
Yield: 8-10 Frozen Snow Globe Sugar Cookies
-
Disney® Frozen® Sugar Cookie Castle
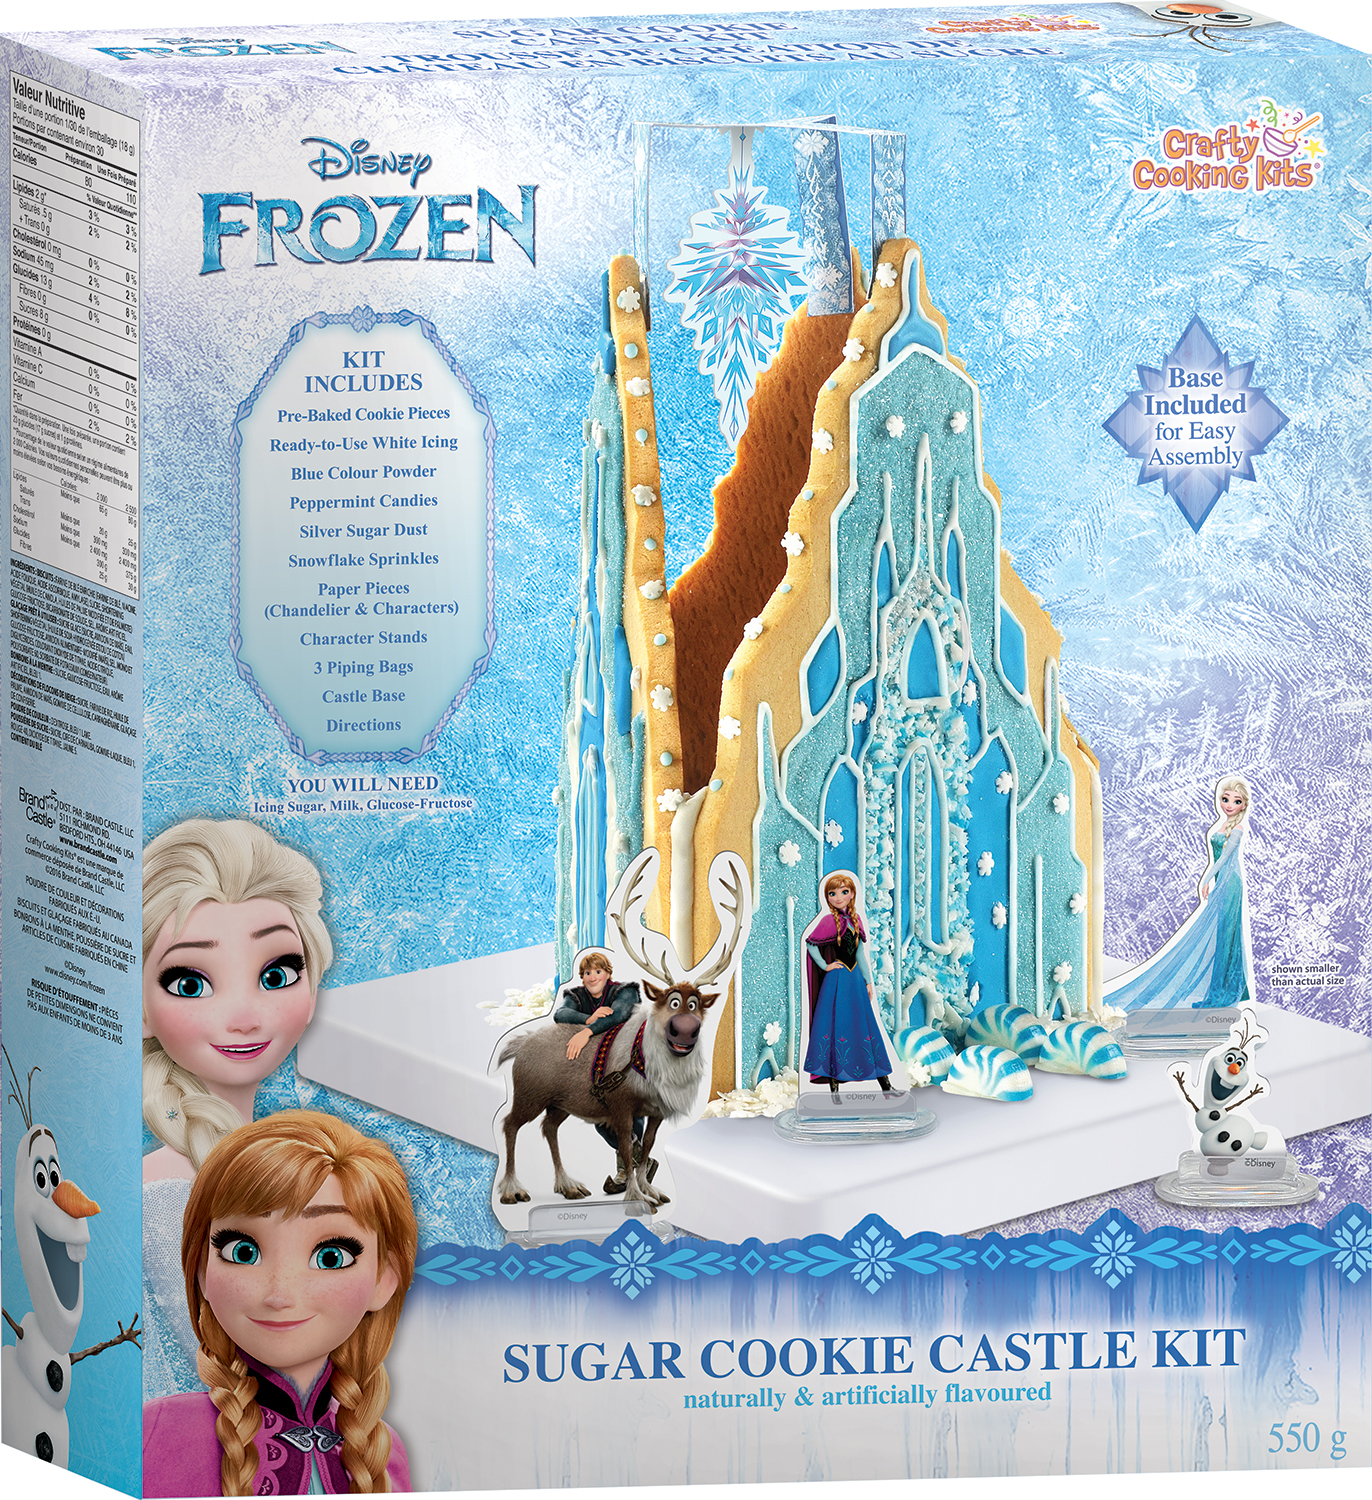
Disney® Frozen® Sugar Cookie Castle
Email These DirectionsYou will need:
For Icing:
2 cups powdered sugar
2 TBSP + 2 tsp. milk
2 TBSP. light corn syrupoptional rimmed baking sheet for easy cleanup
**Adult supervision required. Read directions all the way through before beginning; iced pieces need time to dry once decorated.
PREPARE
Adults Carefully remove cookie pieces from packaging and lay out on a flat surface with smooth sides of cookies facing up. HINT: Always decorate cookies on the smooth side and assemble on the rough side. Combine powdered sugar, milk and corn syrup in a mixing bowl; whisk well until smooth. Insert a piping bag into a glass and pull over edges to hold open. Use a spoon to fill with approximately 1/3 cup of icing. Twist top to close, keep in glass, and set aside. HINT: Use a rubber band to help hold the top of the piping bag closed. Divide remaining icing into two bowls. Whisk 1/4 teaspoon blue color into one bowl until a light blue is obtained. Add enough remaining color to the other bowl and whisk until desired shade is obtained. Discard any remaining color powder. Fill piping bags with icings in same manner as above, twist tops to close, and set aside.ICE & DECORATE
Kids Empty sugar and snowflakes into small bowls. Place a cookie on a rimmed baking sheet.
Adults If desired, assist kids with crushing peppermint candies by placing in a plastic bag and smashing with a rolling pin. Transfer crushed candies to a small bowl. Cut a small tip off of the light blue piping bag. HINT: Start with a small tip, you can always make it larger.
Kids Fill in embossed areas of the cookie by applying gentle pressure and piping a thin layer of icing onto cookie. Use tip of the piping bag to help push icing over areas as desired. Refer to box for inspiration. A toothpick may be helpful to push icing into small corners. HINT: Do not apply icing thickly. Thinly spread icing dries faster. Immediately sprinkle sugar as desired. Turn cookie upside down and gently tap over rimmed baking pan to remove any sugar that fell on an undecorated part of the cookie. Place snowflake shapes and crushed peppermint (if using) onto wet icing. Repeat with remaining cookies and light blue icing.
Adult Place decorated cookies in the refrigerator for 10 minutes to allow icing to set. Icing must set 10 minutes in the refrigerator after each color application to avoid colors running together.
Kids Decorate cookies with darker blue icing, sugar, and candies in same manner. While the white icing was designed to outline castle pieces, it can be used to fill in embossed areas instead. ADULT HINT: Assist kids with any outlining only after blue icings have dried thoroughly. Make sure all decorated cookies have dried firm to the touch, 10 minutes in the refrigerator, before assembling the castle.BUILD
Adults Knead foil icing pouch for 1 minute to a smooth consistency. Cut the tip of the pouch to a 1/4-inch opening. Pipe a line of icing in the channels of the castle base. Squeeze a thick line of icing on the side of the straight edge of each of the cookie pieces. Refer to box for inspiration. Stand one castle piece into the base channel. Insert the next piece into the corresponding base channel and gently press together. Repeat with the last wall. Be mindful of the iced decorations on the castle pieces. Fold chandelier piece as marked and use a tiny bit of remaining icing to glue to the top of the cookie castle pieces. Leftover white icing can be squeezed onto the castle base to look like mounds of snow. HINT: Sprinkle coconut flakes (not included) over the castle base to create a frosty scene. Use icing to attach any remaining peppermint candies to base, if desired. If it will be necessary to move castle, allow it to set for 15 minutes first.
Kids Insert the character pieces into the clear character stands and arrange them around the castle. Admire and enjoy!Yield: 1 Frozen Sugar Cookie Castle
-
Disney® Mickey & Friends Cookies For Santa
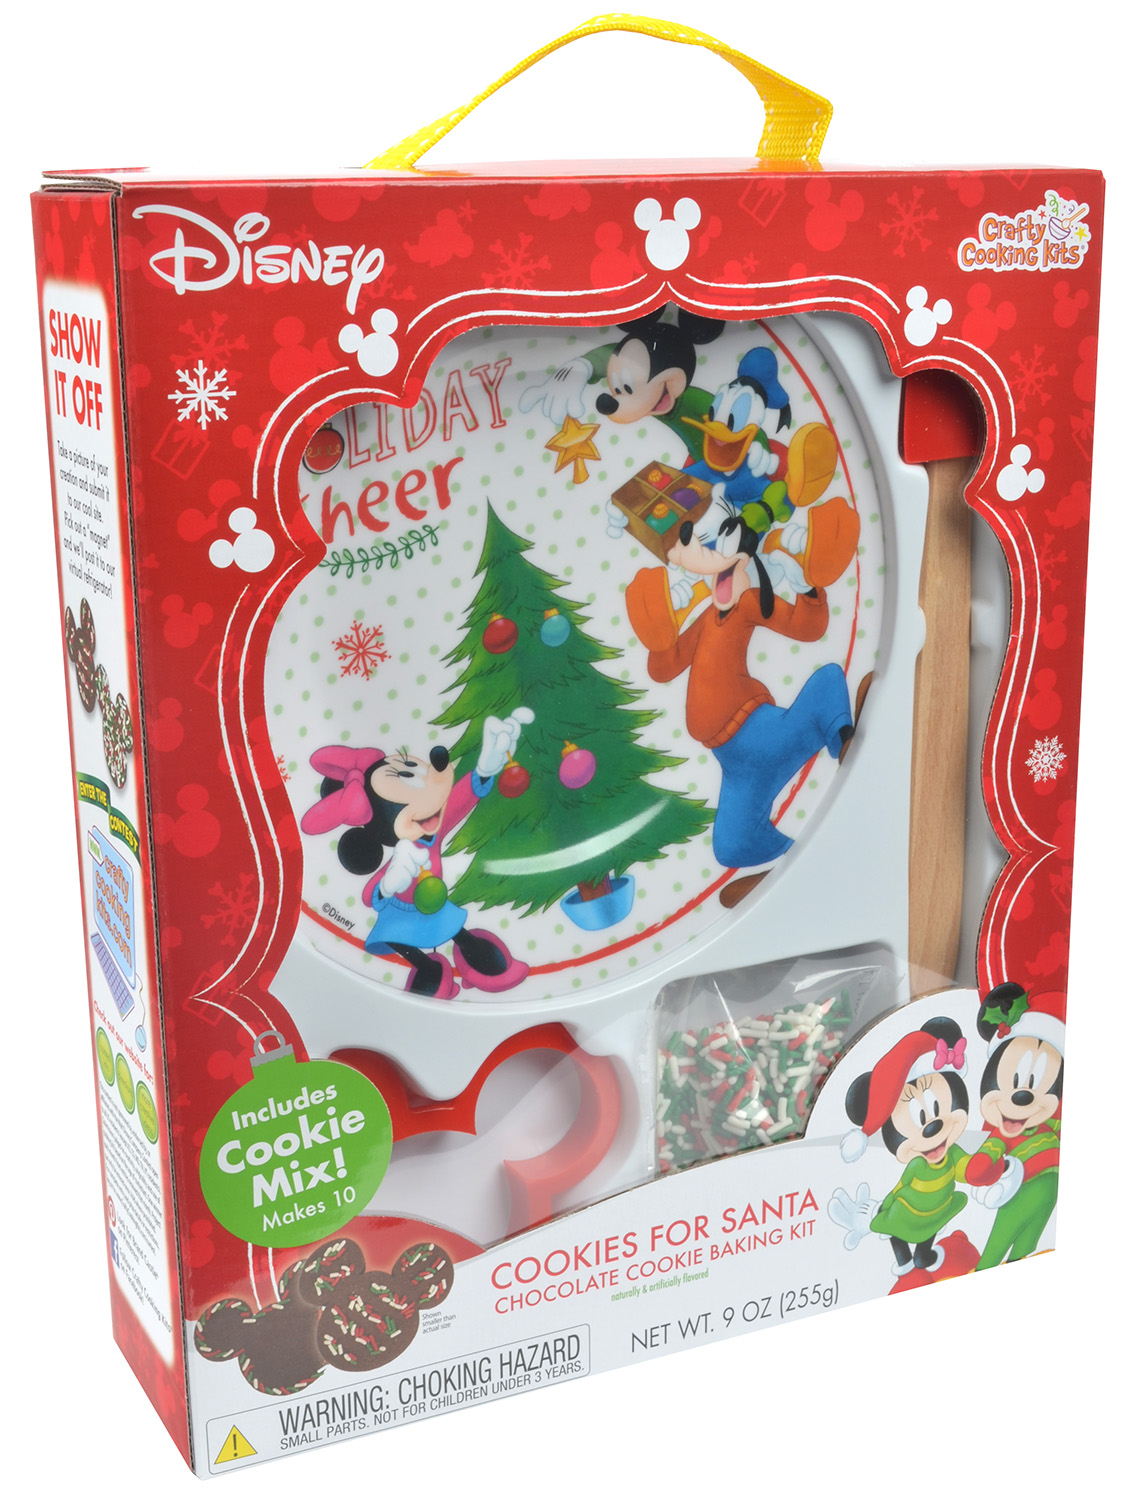
Disney® Mickey & Friends Cookies For Santa
Email These DirectionsYou will need:
4 TBSP room temperature butter
1 eggDirections:
1. Preheat oven to 350°F. Wash cutter, spatula and plate in warm soapy water and dry thoroughly. Lightly grease baking sheet with butter, margarine or cooking spray.
2. Combine cookie mix, butter, and egg. Mix until well blended.
3. Place dough on a lightly floured surface and turn to coat both sides. Roll cookie dough to 3/16-inch thick. Cut out shapes, gathering and rerolling as needed. HINT: If dough becomes sticky, place in refrigerator for 10 minutes and flour rolling pin and dough as required.
4. Place cut outs 2 inches apart on baking sheet. Decorate with sprinkles and bake for 10 to 13 minutes or until edges appear set. Or bake and decorate with frosting (not included) and sprinkles after cookies have cooled.
5. Let cookies cool on baking sheet for 1 minute. Transfer to rack to cool completely. Place on included plate and enjoy!Yield 10 Mickey-shaped chocolate cookies
-
Disney® Mickey Mouse & Friends Holiday Gingerbread House Kit
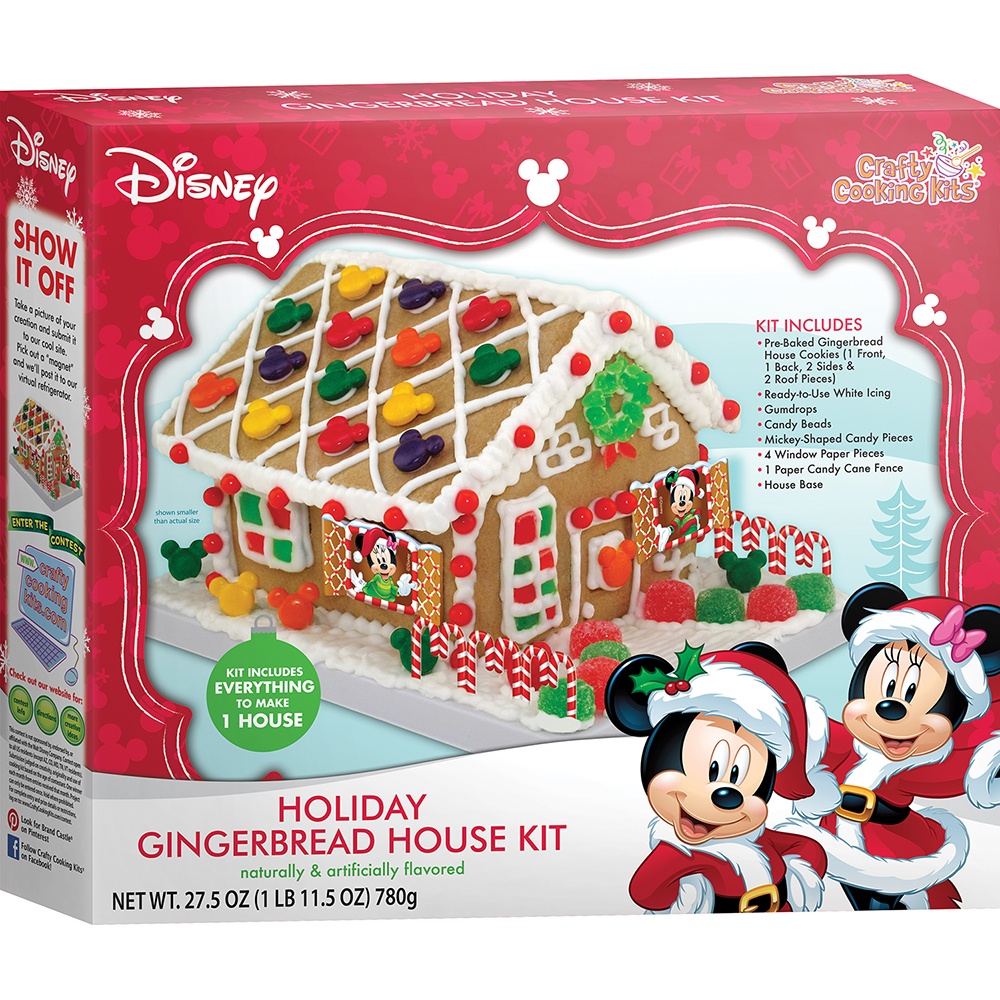
Disney® Mickey Mouse & Friends Holiday Gingerbread House Kit
Email These DirectionsAdult supervision required
Prepare your icing
Adults: Knead icing pouch for 1 minute to a soft, smooth consistency (Figure 1). Remove candies from pouches and set aside for decorating. Carefully remove cookie pieces from packaging and lay out on a flat surface with rough sides of cookies facing up. Snip the corner of the icing pouch to a ¼-inch opening. Be careful not to cut the opening too large.Build your house
Adults: Pipe a line of frosting in the channels of the house base (Figure 2). Squeeze a thick line of icing next to the edge of the front house panel and insert into the house base (Figure 3). Set side walls into channel and press against icing strips on the front house panel (Figure 4). Finish house by icing back edge of back house panel, set in channel, and press against side walls. Allow to set 5 minutes before applying roof. HINT: If cookies crack during construction, use the icing to join broken pieces and let sit 10 minutes before continuing.
Adults: Pipe a strip of icing along the top edges of the house and edge of each roof piece. Attach roof panels to house and press together, holding in place for up to 1 minute. Allow assembled house to set for at least 10 minutes before decorating.
Kids: Plan your designs while you wait.Decorate your house
Kids: Decorate house with icing and candies. Cut candy cane fence piece in half. Secure window pieces and candy cane fence pieces with dabs of icing. The house base may be decorated as well. HINT: Squeeze some icing into a sandwich bag and snip a small corner for fine detailing. Allow house to dry completely before carefully moving.Yield: 1 Mickey & Friends Holiday House
-
Disney® Princess Decal Sugar Cookie Kit
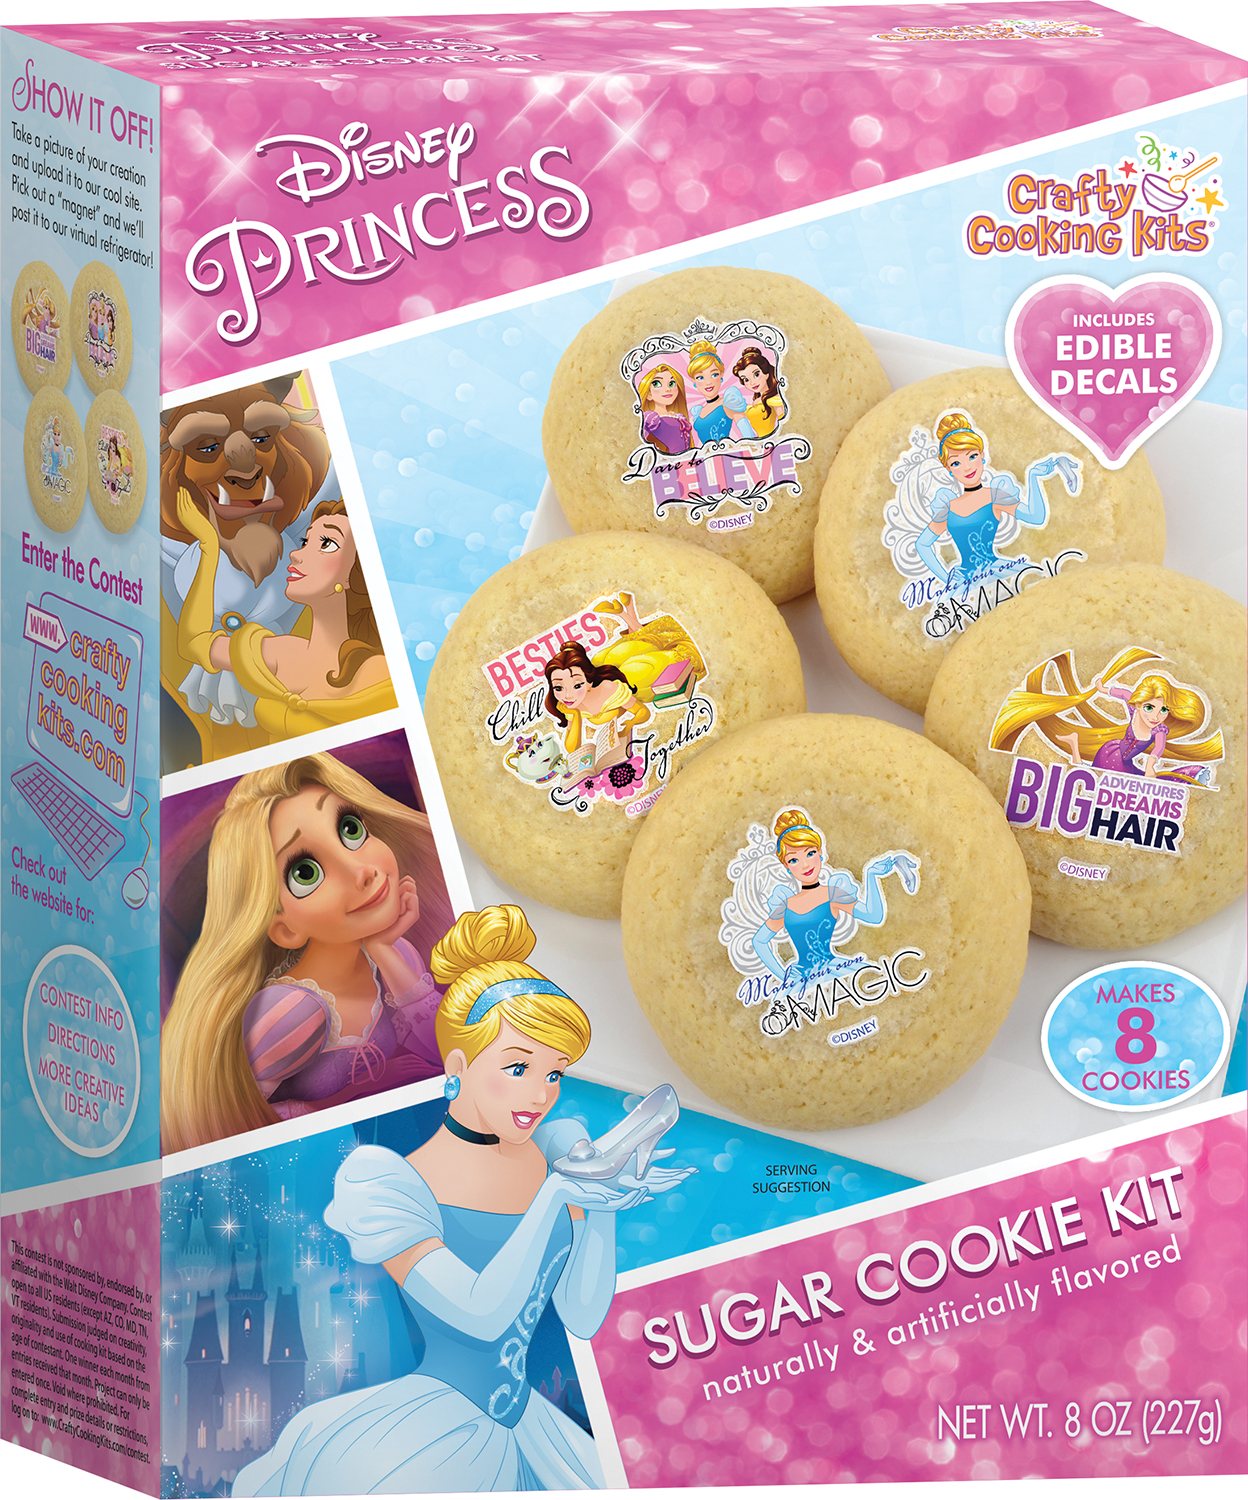
Disney® Princess Decal Sugar Cookie Kit
Email These DirectionsYOU WILL NEED
4 TBSP. room temperature butter
1 eggDIRECTIONS
(Adult Supervision Required)Prepare
Adults Lightly grease baking sheet with butter or cooking spray.
Kids Be sure to wash your hands. Cooking can be messy work. You might want to wear a smock or apron.Mix
Kids Combine cookie mix, butter, and egg* in a large bowl. Mix until well blended. Gather into a ball with your hands and place on a lightly floured surface. Divide into 8 pieces and use your hands to roll cookie dough into balls. Place 2 inches apart on prepared baking sheet.Bake
Adults Use your hands to press each ball slightly to create a flat surface for the decal. Cut open decal pouch and gently peel edible decals from backing sheet. HINT: If decals stick to backing, place sheets in freezer for 2 minutes before continuing. Assist kids in applying decals. If they tear, simply realign on cookie.
Kids Place edible decals directly onto cookie dough and press slightly to adhere. Place cookies in the refrigerator to chill while the oven preheats.
Adults Preheat oven to 350°F. Bake for 12 to 15 minutes or just until edges are golden. Let cookies cool on baking sheet for 1 minute. Transfer to rack to cool completely. Place on a serving platter and enjoy!High Altitude (over 3500 ft.): Add 3 TBSP flour and 2 TBSP water to mix. Mix as directed. Place dough in refrigerator for 10 minutes before continuing.
Yield: 8 Princess Cookies
-
Disney® Princess Pink Cookie Castle Kit
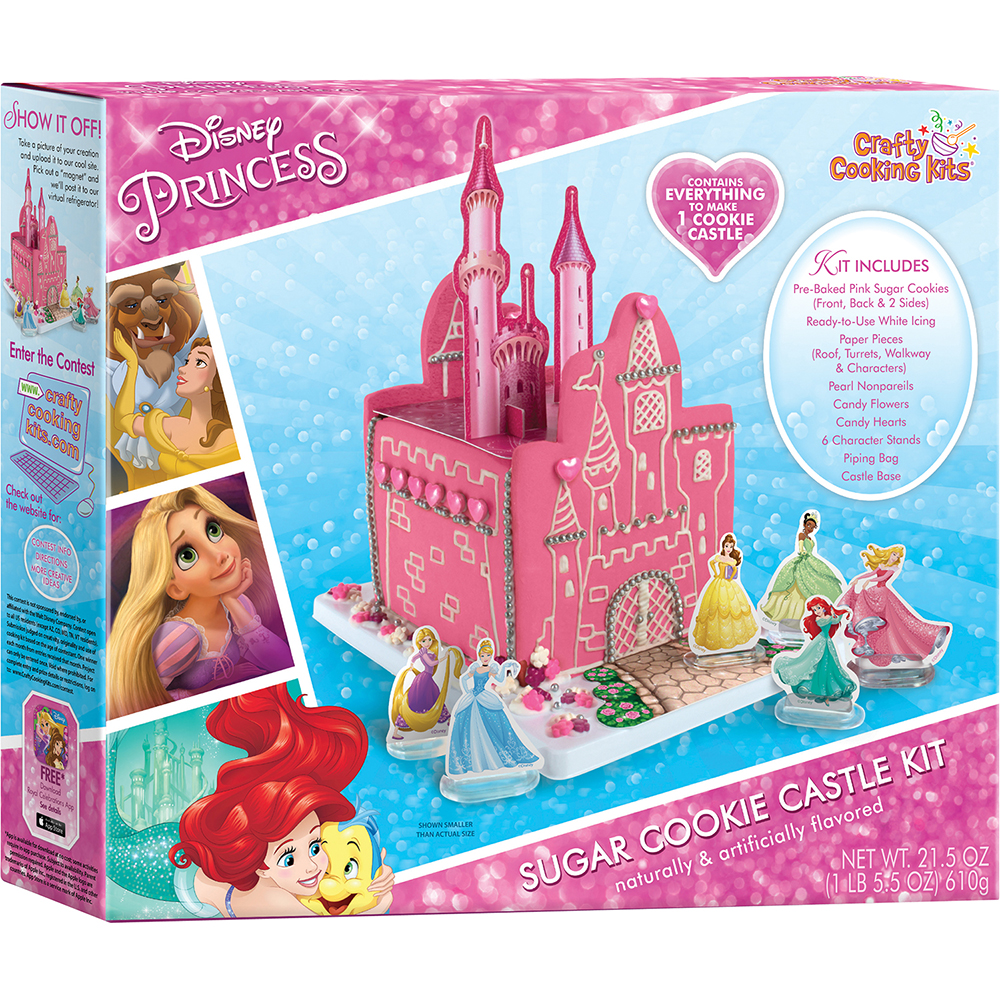
Disney® Princess Pink Cookie Castle Kit
Email These DirectionsDirections
Adult supervision required. Read all directions and decorating tips before proceeding.Prepare your icing
Adults: Knead icing pouch for 1 minute to a smooth consistency (figure 1). Remove candies from pouches and set aside for decorating. Carefully remove cookie pieces from packaging and lay out on a flat surface with rough sides of cookies facing up. Snip a corner of the icing pouch to a 1/4-inch opening.Build your castle
Adults: Pipe a line of frosting in the channels of the plastic base (figure 2). Squeeze a thick line of icing next to the edge of the front castle panel (figure 3) and insert into the plastic base. Set side walls into channel (figure 4) and press against icing strips on the front panel. Finish castle by icing back edge of back castle panel, set in channel, and press against side walls. Allow to set 5 minutes before applying roof. HINT: If cookies crack during construction, use the icing to join broken pieces and let sit 10 minutes before continuing. Apply a line of icing along the top edges of the castle. Gently attach roof cardboard piece and allow to set for 1 minute.
Kids: Plan your designs while you wait.Decorate
Kids: Drape the piping bag over edges of a glass to make filling easier and squeeze remaining white icing into piping bag. Cut a small tip off of the bag, twist the top to close, and gently squeeze frosting to the tip. Carefully trace embossed designs on the cookie pieces. Add piped icing swirls and castle details as desired. Apply candies using dabs of icing, pressing gently to adhere. The plastic base can be decorated as well! Insert the turret pieces into their tabs and place on the roof. Stand princess characters in the included plastic holders and place in position around the castle.
Adults: Allow castle to dry completely for 30 minutes before carefully moving. Admire and enjoy!Yield: 1 Princess Sugar Cookie Castle
-
Easter Bunny Cupcake Kit
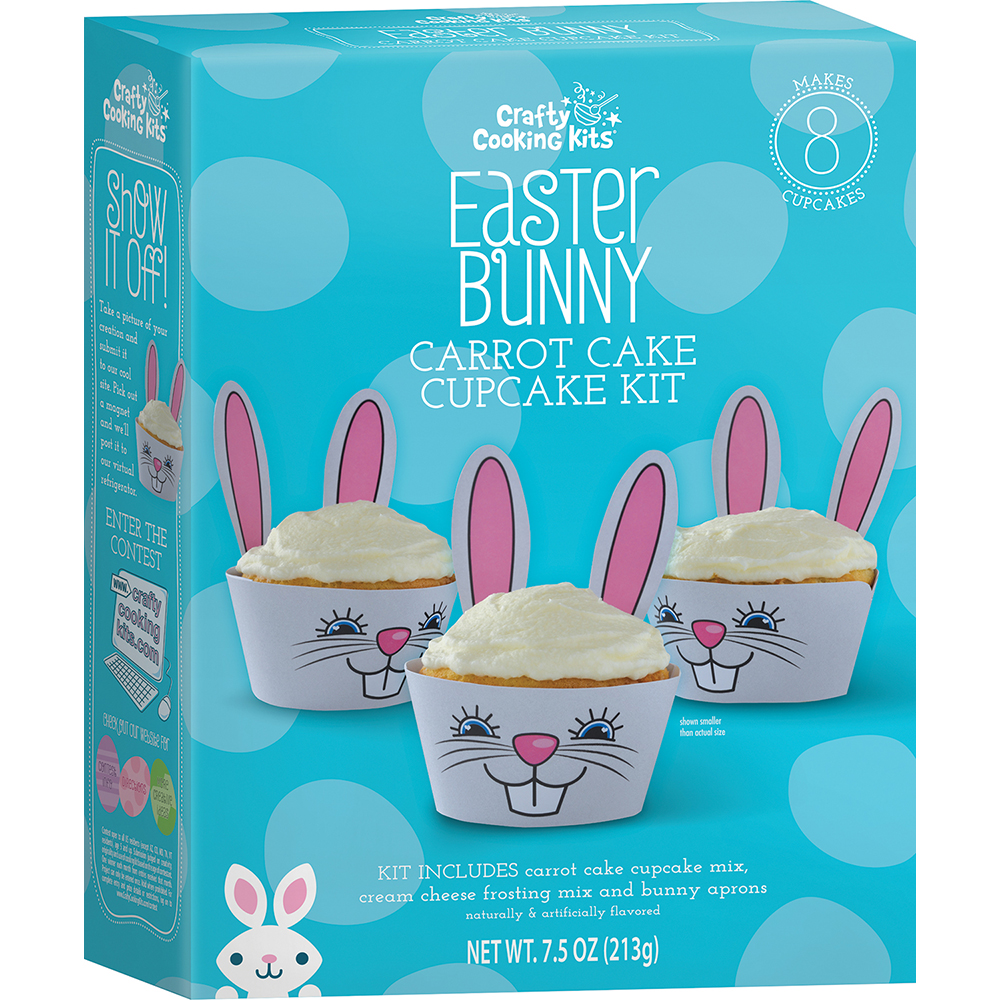
Easter Bunny Cupcake Kit
Email These DirectionsYou will need
Carrot cake cupcakes:
3 TBSP. butter
1/4 cup water
1 eggCream cheese frosting:
4 TBSP. room temperature butter
1 cup powdered sugar
1 TBSP. milk8 baking liners, not included
Directions
1. Prepare
Adults: Preheat conventional oven to 375˚F.
Kids: Be sure to wash hands. Cooking can be messy work. You might want to wear a smock or apron. Line muffin tin with 8 baking liners (not included).2. Mix
Adults: Heat butter in microwave-safe bowl until melted. Let cool 5 minutes
Kids: Combine cupcake mix, melted butter, water and egg in mixing bowl. Using an electric mixer, mix 30 seconds on LOW, 1 minute on MEDIUM. Pour batter into lined muffin cups using a spatula to scrape mix from bowl.3. Bake
Adults: Bake for 16 to 18 minutes or until toothpick inserted into center comes out clean. Remove from oven and allow to cool completely.4. Decorate
Kids: Using an electric mixer, beat room temperature butter on HIGH until light and fluffy. Add frosting mix and powdered sugar; beat on LOW until combined. Add milk and beat on HIGH until light and fluffy. Spread frosting onto cupcakes.
Adults: Assemble aprons by interlocking ends and sit one cupcake in each apron. Serve and enjoy!Yield: 8 Easter Bunny Cupcakes
-
Easter Bunny Pre-Baked Sugar Cookie Kit

Easter Bunny Pre-Baked Sugar Cookie Kit
Email These DirectionsDirections
(Adult Supervision Required)1. Prepare
Adults Remove cookies from packaging and place on a rimmed baking sheet. Cut small tip off of icing pen.
2. Decorate
Kids Empty nonpareils and sugar into small bowls. Squeeze icing onto cookies, following embossed guidelines if desired. Refer to box for inspiration. ADULT HINT: Use a small spatula or kitchen knife to spread icing over larger areas. Immediately add sprinkles as desired. Turn cookie upside down and gently tap over rimmed baking pan to remove any sprinkles that fell on an undecorated part of the cookie. Place cookies on a serving platter and enjoy!Yield: 2 RTE Easter Bunny Sugar Cookies
-
Easter Egg Iced Sugar Cookie Kit

Easter Egg Iced Sugar Cookie Kit
Email These DirectionsYou will need:
For cookies:
6 TBSP room temperature butter
1 egg
1 TBSP waterFor royal icing:
3 TBSP + 2 tsp water1 cup powdered sugar
toothpicks for use in decorating processDirections:
Bake
1. Preheat oven to 350°F. Wash cutter with warm, soapy water and dry thoroughly.
2. Combine cookie mix, room temperature butter, egg and water*. Mix until well blended and dough comes together.
3. On a lightly floured surface, roll cookie dough to 3/16-inch thick. Make shapes with cutter, gathering and rerolling as needed. Place 2 inches apart on a lightly greased baking sheet.
4. Bake for 9 to 11 minutes or until golden. HINT: Thicker cookies may need longer baking time; thinner cookies may bake faster.
5. Let cookies cool on baking sheet for 1 minute. Transfer to rack to cool completely.Decorate
1. Dissolve royal icing mix in water, whisking well. Add powdered sugar and whisk well until dissolved. Divide icing into 4 bowls. Add small amount of red color pouch to one bowl, whisking well until desired shade of color is reached. Repeat process with yellow and blue color pouches. Keep last bowl white.
2. Stand a piping bag in a tall glass and drape over the edge to hold open. Use a spatula to transfer one color of icing to piping bag. Twist top of bag to close and set aside, keeping bag in glass. Repeat with remaining piping bags, icing, and glasses. HINT: If you’d like to create secondary color blends, pour some of each tinted icing into a sandwich bag and cut a small tip when ready to decorate.
3. Working with one cookie at a time, cut a small corner off of one piping bag and squeeze a dollop onto the center of the cookie. Use an offset spatula or butter knife to spread evenly. Pipe contrasting designs with remaining colors while base icing is still wet. Use a toothpick to drag colors gently through icing, creating marbled and other ornate designs. Refer to box for inspiration. Set cookie aside to dry while decorating others. Icing will set in 30 minutes. HINT: Place decorated cookies in refrigerator to quicken the set time. Transfer cookies to a serving platter and enjoy!
*High Altitude (over 3500 ft): Add 1/3 cup flour to mix. Increase water to 1/4 cup. Mix as directed. Place dough in refrigerator for 10 minutes before beginning rolling process.
Yield: 12 Iced Easter Egg Sugar Cookies -
Easter Egg Rainbow Sugar Cookie Kit

Easter Egg Rainbow Sugar Cookie Kit
Email These DirectionsYou will need:
4 TBSP. room temperature butter
1 eggDIRECTIONS
1. PREPARE
Adults: Grease baking sheet with cooking spray, or use silicone liners. Wash cutter in warm, soapy water and dry thoroughly.
Kids: Be sure to wash hands. Cooking can be messy work. You might want to wear a smock or apron.2. MIX
Kids: Combine cookie mix, butter and egg* in large mixing bowl. Mix until well combined. Form dough into a ball and place on floured surface.3. COLOR
Kids: Divide dough evenly into 3 parts. Form a well in center of one dough ball and place into a mixing bowl. Empty one color powder into well. Use hands to knead color evenly into dough until color is vivid. Place colored dough onto floured surface. Wash hands and bowl to remove any color before repeating process with remaining color powders and dough. HINT: To make other colors, combine portions of dough as indicated in color chart and knead dough for a few minutes until color is vivid. Chill dough in refrigerator 5 to 7 minutes to make rolling easier.4. SHAPE
Kids: Place dough onto lightly floured surface and turn to coat both sides. Roll dough to 1/4-inch thick and cut shapes with included cutter, gathering and rerolling dough as needed but returning colored scraps back to their proper color piles. HINT: Dough will warm with repeated playing. If dough becomes sticky, place in refrigerator for 10 minutes and flour rolling pin and dough liberally. Press contrasting colored dough onto cookies to create fun designs. HINT: Another way to achieve a multicolored egg is to cut 2 eggs out of different colors of dough. Cut off portions of each egg and press contrasting pieces next to each other on cookie sheet.
Adults: Place cookies 2 inches apart on prepared baking sheet and chill in the refrigerator while oven preheats to help cookies retain their shapes.5. BAKE
Adults: Preheat conventional oven to 350F. Bake for 10 to 14 minutes. Baking time will vary depending on thickness of cookies – be sure to monitor cookies while baking and remove when edges are slightly golden. HINT: Cookie colors darken as they bake; do not over bake. Allow to cool for 1 minute on baking sheet, then move cookies to rack and cool completely. Place on serving platter and enjoy!*High Altitude (over 3500 ft): Add 3 TBSP flour and 2 TBSP water to mix. Mix as directed. Place dough in refrigerator for 10 minutes before beginning rolling process.
Color Chart
Make other colors!
Pink+Yellow=Orange
Blue+Yellow=Green
Blue+Pink=PurpleHints for successful play:
*Flour dough and surface liberally; dough warms with continued play
*Refrigerate shapes on cookie sheets prior to baking to help retain shape
*Twist ropes of colored dough together before rolling out to create tie-dye effect.Yield: 12 Easter Egg Rainbow Sugar Cookie Kit
-
Emoticon Sugar Cookie Kit

Emoticon Sugar Cookie Kit
Email These DirectionsYou will need
For sugar cookies:
4 TBSP. room temperature butter
1 eggFor icing:
4 tsp. milk
3 tsp. corn syrup*
1 cup powdered sugarDirections
Cookies
1. Preheat oven to 350°F. Lightly grease baking sheet with cooking spray. Wash cutter in warm, soapy water and dry thoroughly.
2. Combine cookie mix, butter and egg**. Mix until well blended.
3. On a lightly floured surface, roll cookie dough to 3/16-inch thick. Make shapes with cutter, gathering and rerolling as necessary. HINT: If dough becomes sticky, place in fridge for 10 minutes, also flour rolling pin and dough liberally. Place 2 inches apart on prepared baking sheet.
4. Bake for 12 to 15 minutes or until edges are golden. HINT: Thicker cookies may need longer baking time; thinner cookies may bake faster.
5. Let cookies cool on baking sheet for 1 minute. Transfer to rack to cool completely.Icing
1. Combine milk and corn syrup together in a bowl. Add yellow icing mix and powdered sugar and stir until well combined.
2. Holding a cookie in your hand, spoon a small amount of icing onto the center. Use the tip of the spoon to carefully spread the icing over the cookie. Repeat with remaining cookies and allow icing to dry completely before decorating, about 30 minutes. HINT: Place cookies in the refrigerator to speed up the process.
3. Cut the tips off of each icing pen and decorate cookies as desired. Refer to box for inspiration. Place Emoticon cookies on a serving platter and enjoy!*3 tsp. sugar dissolved into 1/2 tsp. water may be substituted
**High Altitude (over 3500 ft.): Add 3 TBSP. flour and 2 TBSP. water to mix. Mix as directed. Place dough in refrigerator for 10 minutes before beginning rolling process.Yield: 12 Emoticon Cookies
-
Finding Dory® Mini Vanilla Cupcake Party Kit
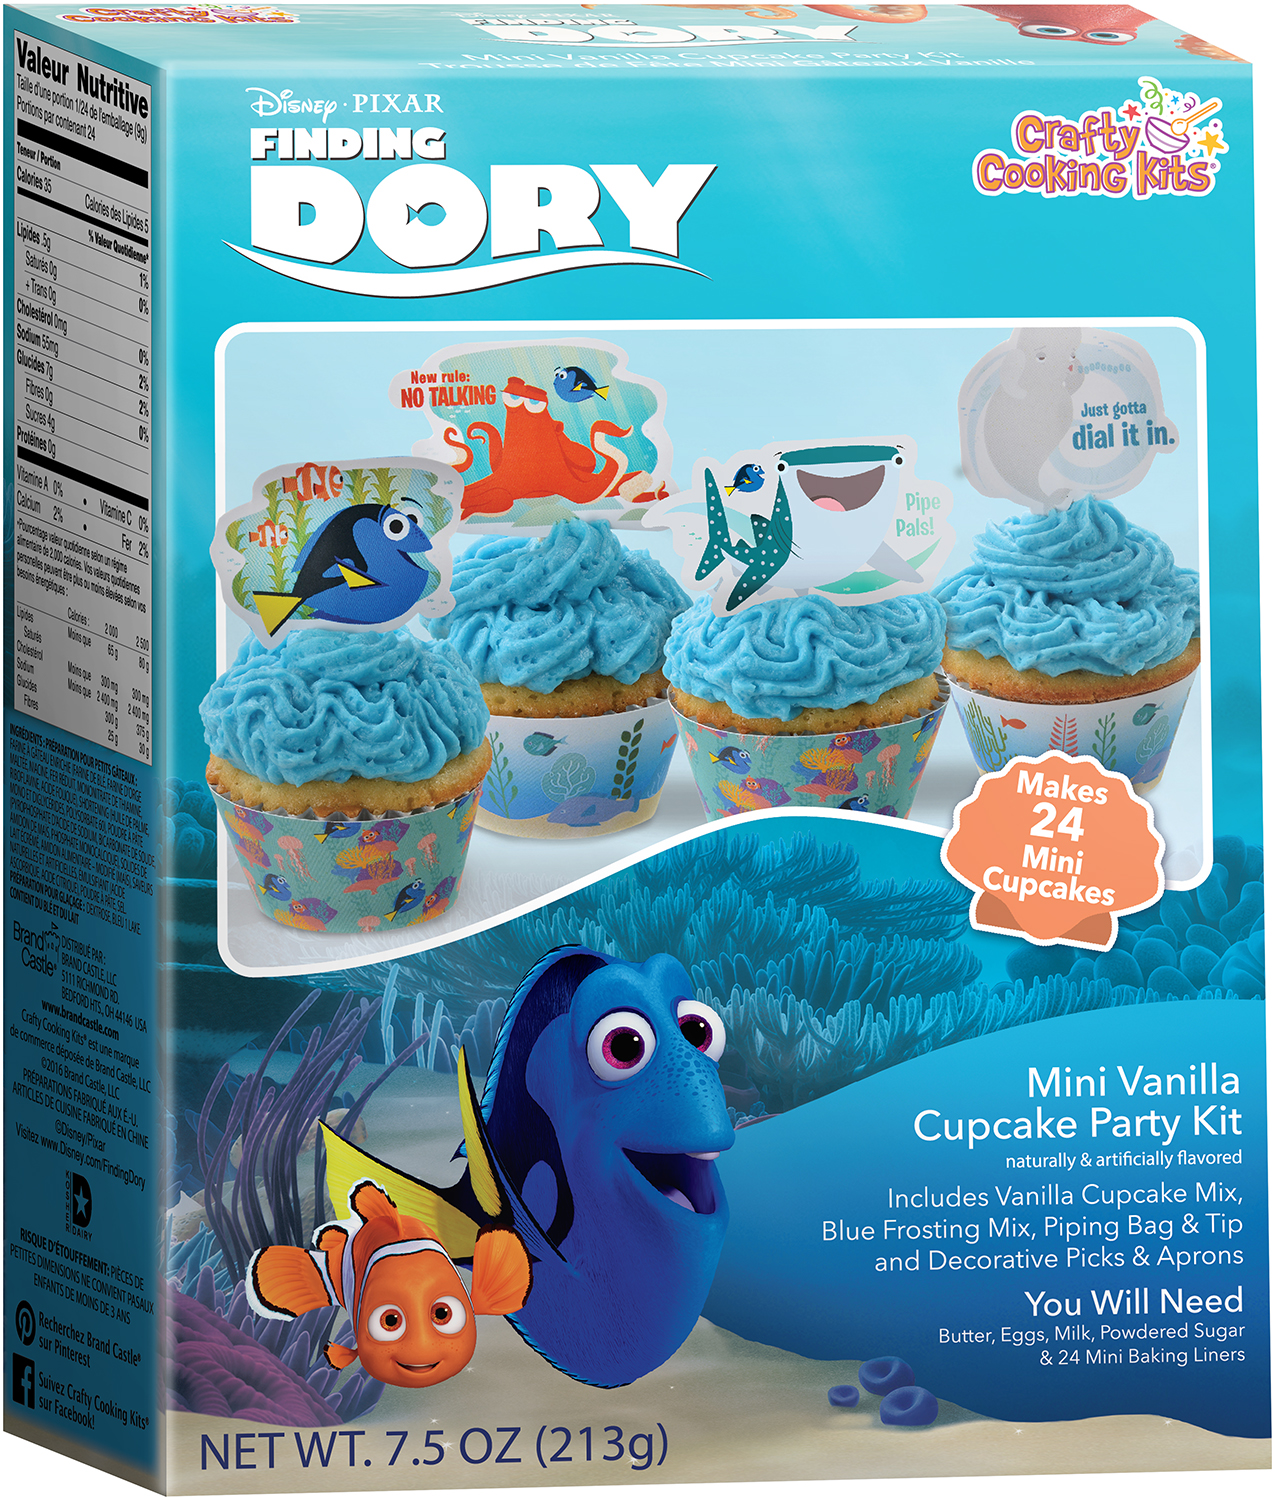
Finding Dory® Mini Vanilla Cupcake Party Kit
Email These DirectionsYou will need:
Cupcakes:
3 TBSP. room temperature butter
1/3 cup water
1 egg
24 mini baking liners, not includedFrosting:
8 TBSP. room temperature butter
2 cups powdered sugar
2 TBSP. milkDirections
1. Prepare
Adults Preheat conventional oven to 375˚F.
Kids Be sure to wash hands. Cooking can be messy work. You might want to wear a smock or apron. Line mini cupcake pan with 24 baking liners (not included).2. Mix
Kids Combine cupcake mix, butter, water and egg* in mixing bowl. Beat only until well-blended. Distribute cupcake batter evenly, using a spatula to scrape all mix from bowl.3. Bake
Adults Bake for 10 to 12 minutes or until toothpick inserted into center comes out clean.4. Cool
Adults Remove cupcakes from oven and cool completely on cooling rack.
Kids Assemble aprons by interlocking ends and place one cupcake in each.5. Decorate
Adults Beat room temperature butter on HIGH until light and fluffy, about 1 minute. Add powdered sugar and blue color pouch and beat on LOW just until combined. Add milk and beat on high until creamy. Cut 1 1/2 inches from tip of piping bag. Insert the piping tip so that 1/2 of the tip pokes through the bag. Drape the piping bag over edges of a glass to make filling easier and use a spatula to fill with the blue frosting. Twist the top of the piping bag to close, and gently squeeze frosting to the tip of the bag.
Kids Pipe frosting onto cupcakes to create ocean wave swirls. Refer to box for inspiration. Insert a character pick** into each cupcake. Place cupcakes on a serving platter, and enjoy!**Remove pick prior to eating.
High Altitude (over 3500 ft.): Add 1/3 cup flour to mix, decrease water to 3 TBSP. Mix only until well blended. Bake 375˚F for 14 to 16 minutes. Makes 24 cupcakes.
Yield: 24 Dory Vanilla Mini Cupcakes
-
Finding Dory® Ocean Pals Paint-A-Sugar Cookie Kit
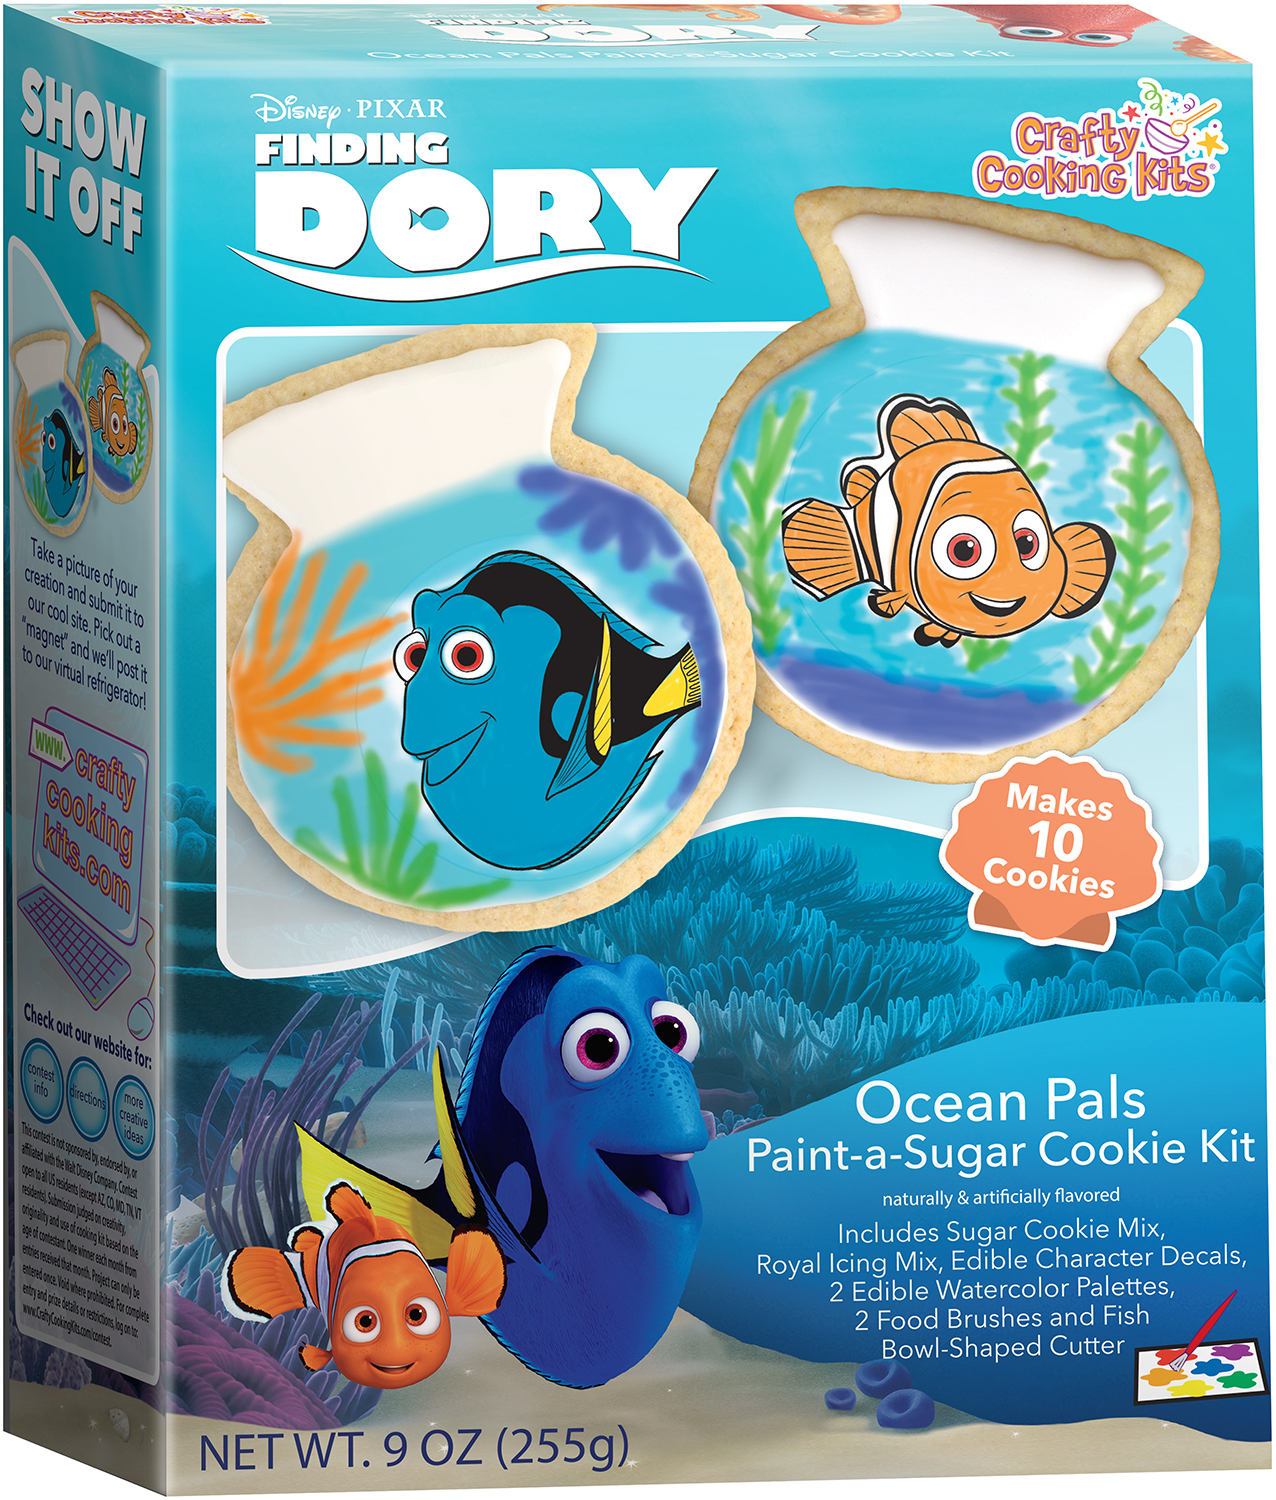
Finding Dory® Ocean Pals Paint-A-Sugar Cookie Kit
Email These DirectionsYou will need:
For sugar cookies:
4 TBSP. room temperature butter
1 eggFor royal icing
5 tsp. water
1 cup powdered sugarDirections
Prepare
ADULTS Preheat oven to 350°F. Lightly grease baking sheet. Wash cutter with warm, soapy water and dry thoroughly.
KIDS Be sure to wash hands. Cooking can be messy work. You might want to wear a smock or apron.Mix
ADULTS Combine cookie mix, butter and egg*. Mix by hand or with an electric mixer until well blended.
KIDS On a lightly floured surface, roll cookie dough to 3/16-inch thick. Make shapes with cutter, gathering and rerolling dough as needed. Place 2 inches apart on prepared baking sheet. HINT: If dough becomes sticky, place in fridge for 10 minutes, also flour rolling pin and dough liberally. Place 2 inches apart on prepared baking sheet.Bake
ADULTS Bake for 12 to 15 minutes or until edges are golden brown.Cool
ADULTS Remove cookies from oven and let cool on baking sheet for 1 minute. Transfer to rack to cool completely.Ice
ADULTS In a small mixing bowl, combine icing mix and water, stir until dissolved. Add powdered sugar and whisk with a fork until smooth.
KIDS Spread icing on each cookie. Refer to box for inspiration.
ADULTS Cut open pouch and gently peel edible decals from backing sheet. HINT: If decals stick to backing, place sheets in freezer for 2 minutes before continuing. Assist kids in applying decals. If they tear, simply re-align on cookie.
KIDS Place edible decals onto wet icing. Be careful--decals should not be moved once applied. Icing will dry completely in 45 minutes at room temperature or place cookies in refrigerator to speed up the process.Paint
ADULTS Place a bowl of water and paper towel next to each work area. Remove watercolor palettes and paintbrushes from pouches.
KIDS Wet brush and tap to remove excess water. Place tip of brush into part of one color on edible watercolor palette and rub gently to activate color. Paint cookies as desired, rinsing brush between colors. Place finished cookies on a platter and enjoy!*High Altitude (over 3500 ft.): Add 3 TBSP. flour and 2 TBSP. water to mix. Mix as directed. Place dough in refrigerator for 10 minutes before beginning rolling process.
Yield: 10 Finding Dory Ocean Pals Paint-A-Cookies
-
Frosted Monsters Sugar Cookie Kit
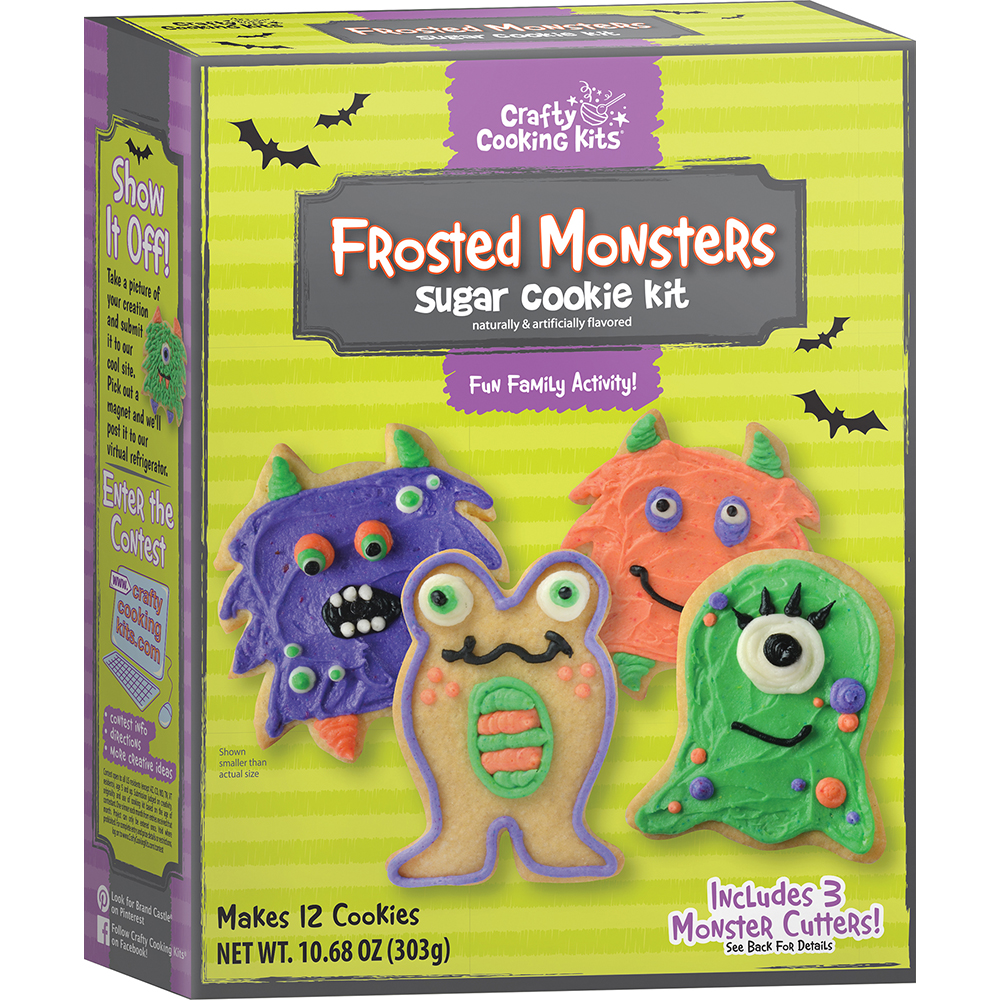
Frosted Monsters Sugar Cookie Kit
Email These DirectionsYou will need:
For sugar cookies:
4 TBSP room temperature butter
1 eggFor vanilla frosting:
8 TBSP. room temperature butter
2 cups powdered sugar
2 TBSP. milkAdult Supervision Required
1. PREPARE
Adults: Preheat oven to 350°F. Lightly grease baking sheet with butter or cooking spray. Wash cutters in warm, soapy water and dry well.
Kids: Be sure to wash hands. Cooking can be messy work. You might want to wear a smock or apron.2. MIX
Kids: Combine cookie mix, butter and egg*. Mix until well blended.
On a lightly floured surface, roll cookie dough to 3/16-inch thick. Cut shapes with cutters, gathering and rerolling dough as necessary. HINT: If dough becomes sticky, place in fridge for 10 minutes, also flour rolling pin and dough liberally. Place 2 inches apart on prepared baking sheet.3. BAKE
Adults: Bake for 12 to 15 minutes or until edges are golden. Let cookies cool on baking sheet for 1 minute. Transfer to rack and allow to cool completely.4. DECORATE
Adults: Using an electric mixer, beat room temperature butter on HIGH for one minute, or until light and fluffy. Add frosting mix and powdered sugar and beat just until combined. Add milk and beat frosting on HIGH for 1 minute until creamy. Insert one of the piping bags into a glass and pull edges over rim of glass to hold bag open. Use a spatula to fill with 1/4 cup of frosting. Twist top of the piping bag to close, cut a small tip, and set aside. HINT: Start with a small tip. You can always make it larger. Divide remaining frosting evenly into 3 bowls. Assist kids with adding color powders as indicated in below chart to each bowl, stirring until color is well blended. Fill remaining piping bags as before, cut small tips, twist tops to close, and set aside.
Kids: Squeeze frosting onto cookies, using a butter knife or small spatula to spread over surface. Pipe contrasting spots, eyes and furry details onto each cookie. Cut a small tip off the black icing pen and squeeze to create eyes, fangs and other fun effects. Refer to box for inspiration. Place Frosted Monsters cookies on a serving platter and enjoy a spooky snack.
To make Purple: add 1/2 pink and 1/2 blue color powder to bowl
To make Orange: add 1/2 yellow and 1/2 pink color powder to bowl
To make Green: add 1/2 blue and 1/2 yellow color powder to bowl* High Altitude (over 3500 ft): Add 3 TBSP flour and 2 TBSP water to mix. Mix as directed. Place dough in refrigerator for 10 minutes before beginning rolling process.
Yield: 12 Frosted Monsters Sugar Cookies
-
Geeky Chef Emoticon Sugar Cookie Kit

Geeky Chef Emoticon Sugar Cookie Kit
Email These DirectionsYou will need
For sugar cookies:
4 TBSP. room temperature butter
1 eggFor icing:
4 tsp. milk
3 tsp. corn syrup*
1 cup powdered sugarDirections
Cookies
1. Preheat oven to 350°F. Lightly grease baking sheet with cooking spray. Wash cutter in warm, soapy water and dry thoroughly.
2. Combine cookie mix, butter and egg**. Mix until well blended.
3. On a lightly floured surface, roll cookie dough to 3/16-inch thick. Make shapes with cutter, gathering and rerolling as necessary. HINT: If dough becomes sticky, place in fridge for 10 minutes, also flour rolling pin and dough liberally. Place 2 inches apart on prepared baking sheet.
4. Bake for 12 to 15 minutes or until edges are golden. HINT: Thicker cookies may need longer baking time; thinner cookies may bake faster.
5. Let cookies cool on baking sheet for 1 minute. Transfer to rack to cool completely.Icing
1. Combine milk and corn syrup together in a bowl. Add yellow icing mix and powdered sugar and stir until well combined.
2. Holding a cookie in your hand, spoon a small amount of icing onto the center. Use the tip of the spoon to carefully spread the icing over the cookie. Repeat with remaining cookies and allow icing to dry completely before decorating, about 30 minutes. HINT: Place cookies in the refrigerator to speed up the process.
3. Cut the tips off of each icing pen and decorate cookies as desired. Refer to box for inspiration. Place Emoticon cookies on a serving platter and enjoy!*3 tsp. sugar dissolved into 1/2 tsp. water may be substituted
**High Altitude (over 3500 ft.): Add 3 TBSP. flour and 2 TBSP. water to mix. Mix as directed. Place dough in refrigerator for 10 minutes before beginning rolling process.Yield: 12 Emoticon Cookies
-
Geeky Chef Poo Chocolate Meringue Kit
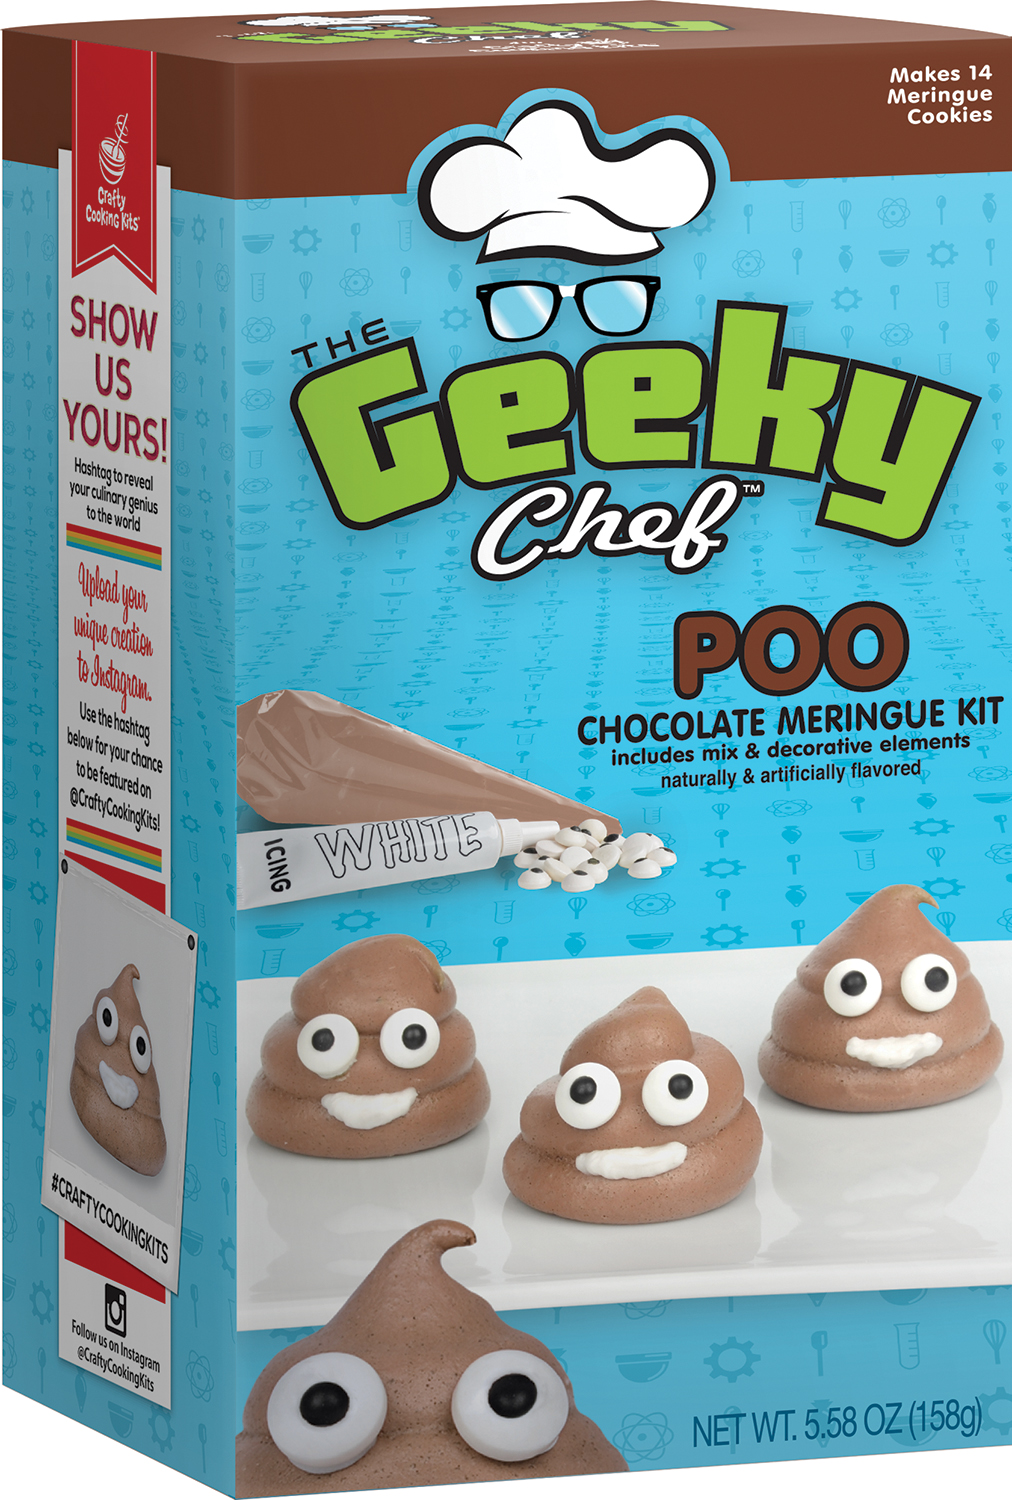
Geeky Chef Poo Chocolate Meringue Kit
Email These DirectionsYou will need
2 large egg whites, at room temperature
parchment paper to line baking sheetDirections
1. Preheat oven to 200˚F. Line baking sheet with parchment paper.
2. Whip egg whites in stand mixer with whisk attachment for one minute on MEDIUM until opaque and bubbly. Gradually add pouch with mixer on LOW, stopping occasionally to scrape down from sides. Whip on HIGH until stiff peaks form, 3 to 5 minutes.
3. Stand piping bag in a tall glass and pull down over edges to make filling easier. Use a spatula to gently fill with meringue mixture.
4. Cut an inch off of the end of the piping bag and gently squeeze meringue mixture to the tip. Holding the piping bag perpendicular to the parchment paper, pipe a small mound about 1 ½ inches in diameter, then lift tip a bit to pipe another smaller mound, and one more on top of that. Stop squeezing meringue and lift tip from mixture to create a small swirl. Repeat to make 14 poo shapes.
5. Bake at 200˚F for 90 minutes. Meringues are done when they release easily from the parchment paper, feel dry and airy to the touch, and are uniformly colored on the bottom.
6. Turn oven off, crack open door, and let cool at least 30 to 60 minutes to slowly come to room temperature.
7. Cut small tip off of the icing pen and use to secure candy eyes. Draw a smile on each Poo Meringue Cookie, referring to box for inspiration. Place on a serving platter and enjoy!Hints for successful meringue baking:
*Ensure there is absolutely no yolk in the bowl, as this will prevent egg whites from stiffening.
*Use a clean bowl and whisk free from any cooking spray or grease.
*Do not bake on a humid day; meringues are extremely susceptible to humidity and will become sticky and soft.
*Bake long and slow, and allow for a long cool down per instructions—do not rush meringues to room temperature or they will crack.Yield: 14 Poo Meringue Cookies